
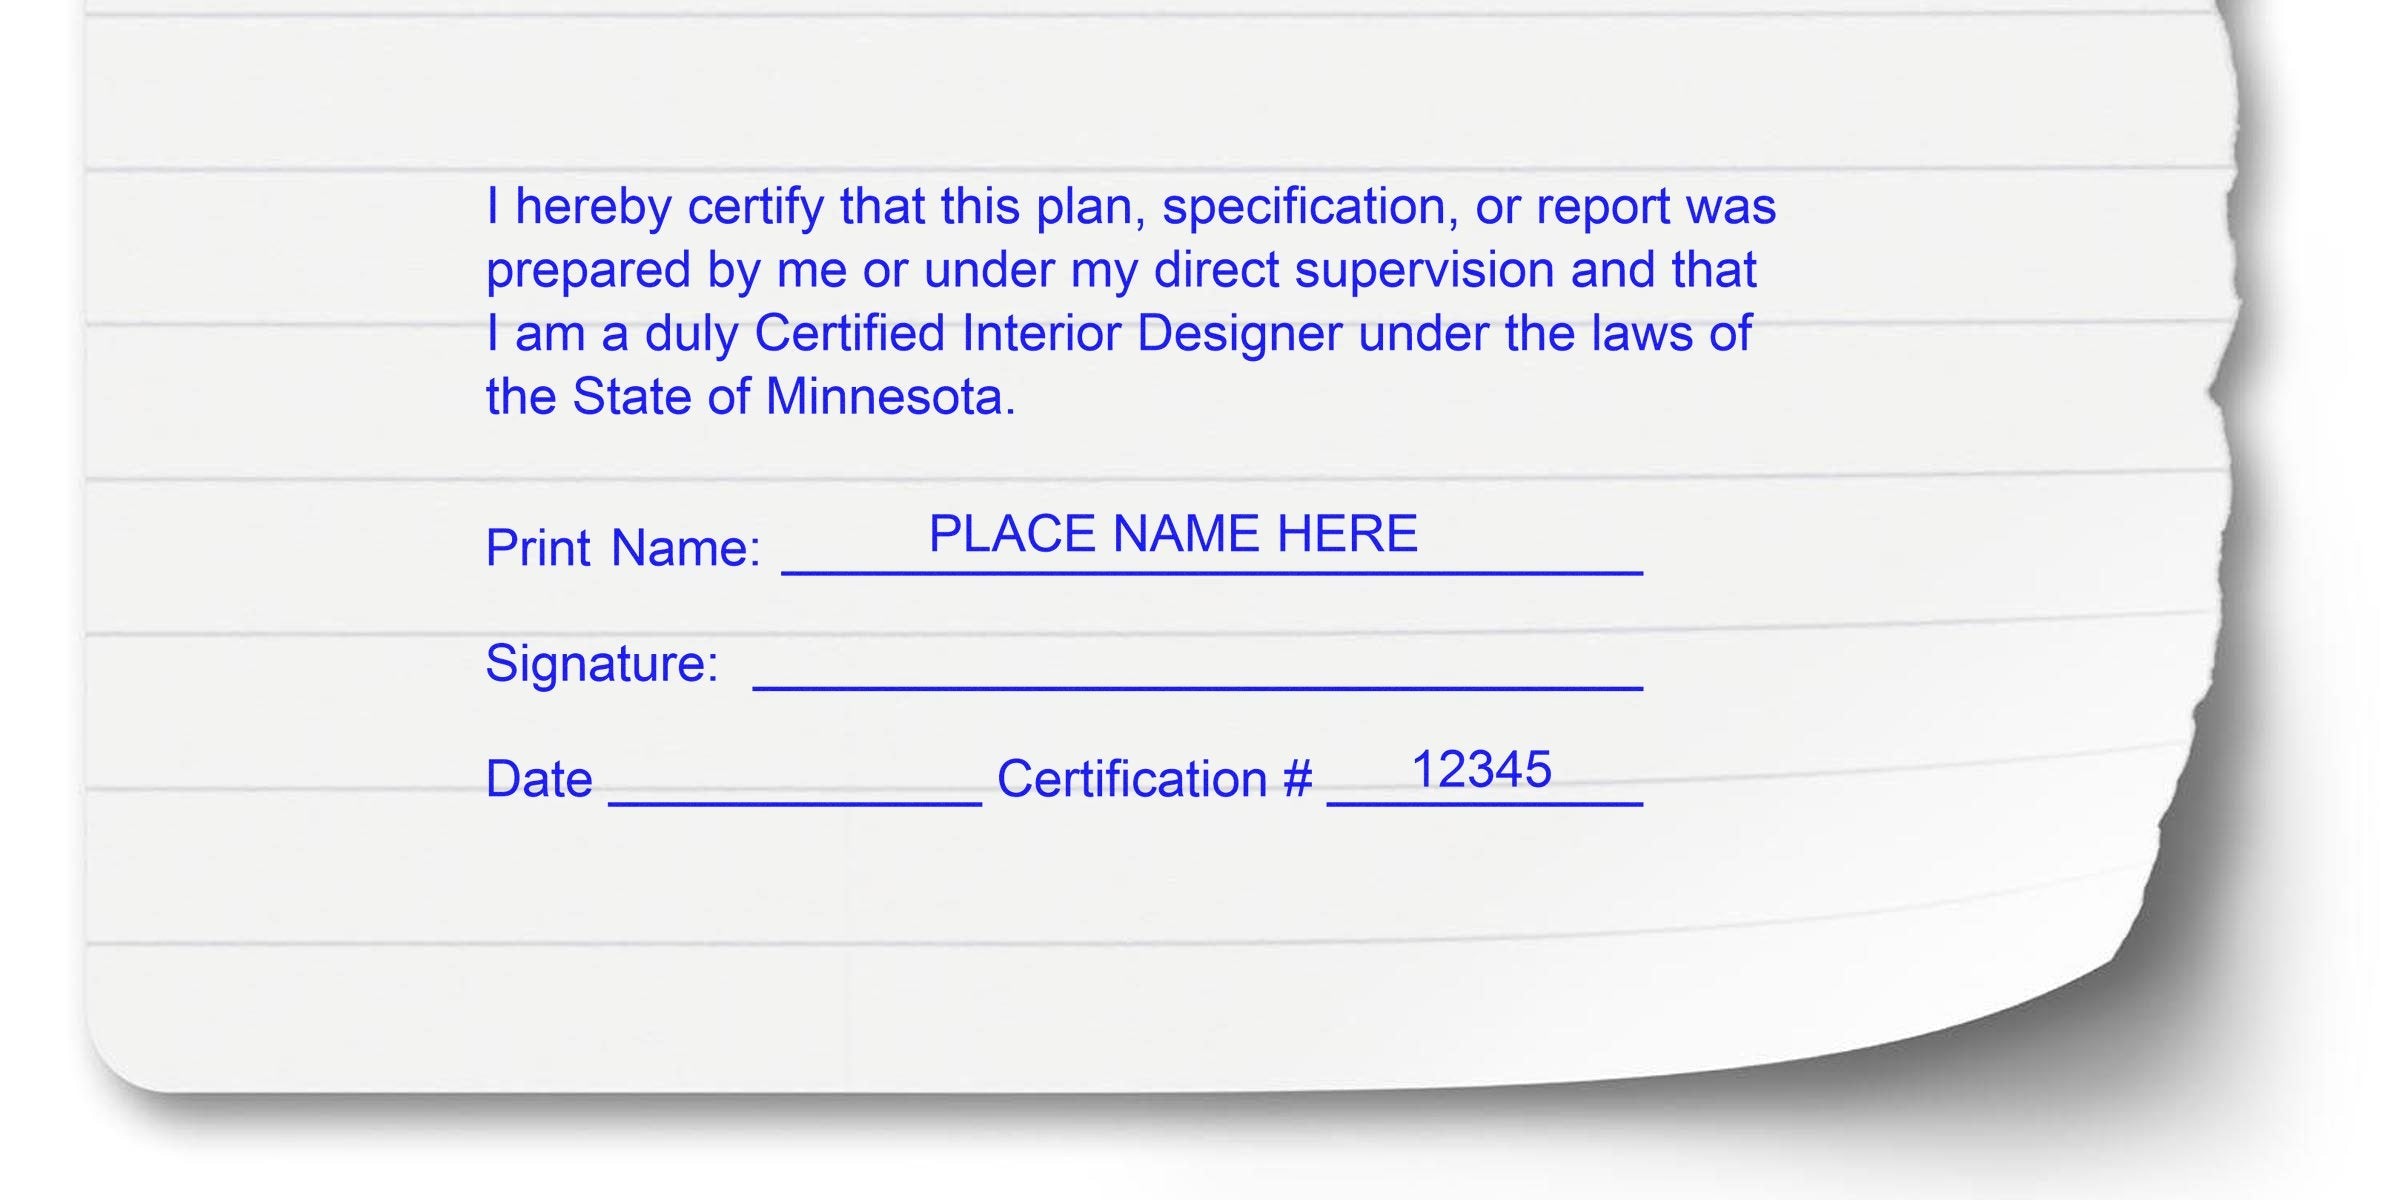
If you’re a Minnesota-based interior designer, you’ve likely heard about the need for an official interior designer stamp for Minnesota projects. It’s easy to think of a stamp as a simple rubber tool, but in reality, this little device quickly becomes a big deal when it comes to compliance, credibility, and client confidence. By understanding the rules behind Minnesota’s design requirements, you’ll see how the right stamp or seal can help you stand out as a true pro in your field.
Beyond boosting your professional image, your seal helps confirm that your work meets state guidelines. In this post, we’ll walk through how to secure the right stamp, when you need it, and how to maintain it so you’re always ready for your next project. From key regulations to stamp types, plus tips for storing your seal properly, we’ve got you covered.
Recognize Minnesota Licensing Requirements
If you’re practicing interior design in Minnesota, you need to stay on top of local licensing rules. It might feel like a lot of paperwork at first, but these regulations exist to keep design standards consistent and ensure client safety. When you display an official seal or stamp, you’re showing that you’ll go the extra mile to meet the expectations set by state authorities.
Why a Stamp Matters
- Demonstrates professional integrity: A stamped document says to clients, “I’ve earned the right credentials for the job.”
- Simplifies project approval: City and county offices often look for a stamp as a green light during your design submissions.
- Protects you legally: Using your stamp properly can help shield you if disputes arise about authenticity or regulatory compliance.
Key Documentation You Need
Minnesota has specific guidelines on what you should include with your stamped documents. It usually involves:
- Your legal name, written exactly as it appears in your licensing documents.
- Your license number, so authorities can confirm you have a valid credential.
- The date, to show when you’ve signed off on designs.
You can check with Minnesota’s Board of Architecture, Engineering, Land Surveying, Landscape Architecture, Geoscience, and Interior Design for the most up-to-date criteria. Although the exact details might change over time, making sure you follow current guidelines is crucial for avoiding any compliance hiccups.
Understand The Role Of A Seal
You might be thinking: “What’s the difference between a seal and a stamp?” Many people use these words interchangeably, but in a professional context, a seal is typically the embossed impression or ink-based mark verifying your license details. The stamp itself is often what creates that seal. It’s your official signature in the eyes of regulatory agencies and clients.
Digital vs. Physical
In an increasingly paperless world, you may wonder if you still need a physical stamp. The answer often depends on who you’re submitting your designs to. While some governmental offices allow digital seals, others prefer a traditional, ink-based mark. That’s why many Minnesota interior designers keep both an electronic seal on file and a physical stamp in their office drawer.
- Digital Seal: Ideal for job submissions done entirely online.
- Physical Stamp: Perfect for paper applications and for those clients or offices that like to have documents in a tangible format.
Advice From Professionals
Many established designers find that having access to multiple seal formats is a lifesaver. You can pivot between digital and physical effortlessly, saving you time on each project submission. Always confirm with the receiving party (such as a local building department) which format they accept.
Obtain A Minnesota Interior Designer Stamp
Securing an official stamp can feel a bit daunting at first. After all, it’s a specialized item and not something you can just pick up at any store in the stationery aisle. The good news is, you don’t have to go on a wild search. Places like minnesota interior designer stamp can handle the details for you, including the correct layout, mandated wording, and official shield or seal design required by the state.
How To Order
- Confirm your licensing details: Double-check your official name and license number.
- Choose a reputable supplier: Look for companies that specialize in professional stamps.
- Provide design specs: The state often has specific dimensions and wording, so make sure your stamp supplier is aware of them.
- Request a proof: If possible, ask for an electronic proof of your seal before it’s physically produced.
While you can usually do this all online, don’t be afraid to call and speak with someone directly—especially if you have any last-minute questions.
What About Cost?
Costs vary depending on whether you want a self-inking stamp or a pre-inked embosser. Self-inking stamps often have a replaceable ink pad, while pre-inked stamps are usually more expensive up front but require fewer ink refills over time. Embossers, on the other hand, might cost a bit more because they’re made of heavier-duty materials and press a pattern into the page. Each option has its own perks, so it’s worth comparing before making a decision.
Explore Stamp And Seal Options
Once you decide to order, you’ll come across many style choices. You might see fancy handles, heavy-duty metal frames, or smaller plastic housings. No matter what design you choose, your top priority is ensuring it meets Minnesota’s regulatory rules.
Popular Types Of Stamps
- Self-Inking: Includes an internal ink pad that re-inks the die each time you press. These are quick, convenient, and commonly used for large stamping jobs.
- Pre-Inked: Provides crisp, high-detail impressions. They can handle more intricate logos or design elements.
- Embossers: Often used for official documents or a more “professional” look, as they raise the paper surface rather than adding ink.
Consider Practicality And Aesthetics
You don’t want just any tool on your desk, right? If you’re stamping frequently, a rubber stamp with a comfortable grip might be more ergonomic. If you mostly want a design flourish on formal documents, an embosser might be better. In any case, be sure the device is sized to accommodate all the text Minnesota requires. You’ll probably need your name, license number, and possibly a reference to the state.
Manage State Compliance Details
Navigating state rules can feel overwhelming, but it’s a must if you want to protect your license. Here are some tips to keep your design projects fully compliant:
Double-Check The Wording
Small typos can lead to big administrative headaches. Always confirm that your stamp includes the right text. For instance, some stamps must say “Registered Interior Designer” alongside the state name, while others require your unique license number. If anything is off, it might invalidate your design submissions.
Track Your License Renewal
Minnesota interior designers have to renew their licenses periodically. If your license status changes, you must update any references on your stamp, too. Renewal dates in Minnesota often come with continuing education requirements, so mark your calendar to stay ahead of deadlines. Depending on your stamp supplier, you may qualify for a discount if you need an updated stamp.
Maintain Electronic Files Safely
If you also use an electronic seal, store the digital copy in a secure folder. That way, only you (and any authorized staff) have control over it. Encrypt the file or use secure software that helps protect it from unauthorized copying. Also, keep a backup somewhere safe—just in case.
Use And Care For Your Stamp
Owning a stamp is one thing, but using it regularly in a busy firm can wear out certain components. With some basic upkeep, you’ll keep your impressions crisp and your processes smooth.
Step-by-Step Stamp Maintenance
- Clean the Die: Every so often, gently wipe away any dried ink. Use a slightly damp cloth or specialized rubber stamp cleaner.
- Refill Ink: If using a self-inking or pre-inked stamp, top off the ink as soon as impressions start looking faint.
- Store Correctly: Keep your stamp in a dust-free drawer, upright, so you don’t accidentally press ink onto important paperwork.
- Test On Scrap Paper: Before stamping official documents, test the impression on a practice sheet.
Pro Tips For Longevity
- Avoid direct sunlight: Prolonged exposure can dry up your ink quickly and degrade rubber parts.
- Replace broken parts immediately: A loose handle or chipped die can lead to distorted impressions.
- Keep a spare ready: If you stamp hundreds of pages, consider purchasing a second device. That way, you won’t have to put projects on hold if the original needs repair.
Benefit From A Trusted Supplier
Finding a reliable supplier might be the best decision you make for smooth stamp ordering. One proven favorite is Acorn Sales. We’ve been in business since 1964 and pride ourselves on supplying high-quality Minnesota Interior Designer stamps and seals. You can count on clear impressions, durable construction, and a straightforward ordering process.
What Makes Acorn Sales Different?
- Expert Knowledge: We’ve tailored stamps for nearly every professional niche, so we understand Minnesota’s specific requirements for interior designers.
- Free Electronic Seal: When you order your physical stamp, we provide a digital seal at no extra charge, making it simpler to handle electronic documentation.
- Time-Saving Customer Support: Have a question? Our team is ready to help you confirm that every detail on your stamp meets state guidelines.
Knowing you’re partnering with a supplier that specializes in professional seals can save you headaches down the road. If there’s ever a change to Minnesota’s format requirements, companies like Acorn Sales can guide you through any necessary updates.
Finalize Your Documentation
You’ve got your instructions and you know how to care for your stamp, but how do you pull it all together? Putting your stamp on a set of design plans is more than just pressing ink on paper. In the eyes of your clients and local regulations, it’s the final step that officially endorses your creative work.
What You Should Include
- Signed and Dated Plans: Make sure to sign each page or set of prints where required.
- Official Stamp or Embossed Impression: The seal must be easily visible so that anyone reviewing your documentation sees it immediately.
- Additional Info if Required: Sometimes, design boards want your contact details or license renewal date. Double-check with your local issuing agency.
Presenting a Professional Image
Your stamped documents carry your professional reputation. Clients, contractors, and building officials will see those pages and trust that you’ve done your homework. It might feel like an afterthought, but your care in following Minnesota’s exact guidelines speaks volumes about your dedication to quality interior design.
Putting a professional stamp on your design plans can be a game-changer. Not only does it present you as a serious interior designer, but it also ensures that your documents are legally recognized by the appropriate entities in Minnesota. Once you’ve got everything in place, stamping and sealing becomes second nature, offering both you and your clients peace of mind.
Feel free to reach out if you need more help. Good luck with your interior design projects, and happy stamping!
Frequently Asked Questions
Do I need separate stamps for each state if I practice in multiple locations?
Yes. Each state has its own rules on stamp content, format, and usage. Make sure you have separate stamps customized to each state’s requirements, so you can avoid any compliance confusion.
Can I use a self-inking stamp, or do I need an embosser?
It depends on personal preference and local guidelines. Some jurisdictions prefer an embossed seal, while others accept an inked impression (like a self-inking or pre-inked stamp). Be sure to confirm what your local office expects, but either option can be valid in Minnesota if it meets their design standards.
How often should I replace the ink or embossing plates?
Monitor your impressions regularly. If you notice blotchy or faint marks, it’s likely time to re-ink or replace the embossing plate. Many designers like to keep extra ink on hand, and they re-ink every few months to maintain crispness.
Why should I choose Acorn Sales over other suppliers?
We’ve built a reputation since 1964 for professional-grade stamps and seals that comply with state requirements—including Minnesota’s—and we throw in a free electronic seal to make your life easier. If you ever have questions, our team is here to provide quick, friendly support.








